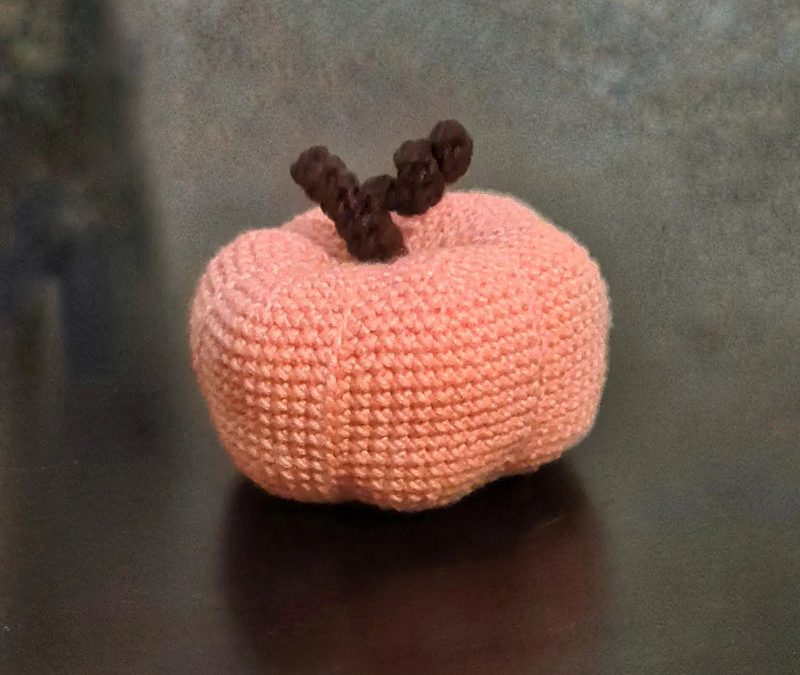
Halloween is coming soon and, if you’re looking for a quick pattern to make some decorations, here you have this cute stylish pumpkin you can crochet in one piece, with very little sewing for tightening.
The size of the pumpkin depends on the type of yarn and crochet hook you use. So if you use thin yarn and a smaller crochet hook, you will have these cute small pumpkins that fit in your palm, while a thicker yarn and bigger crochet hook will create a bigger size pumpkin decoration.
For this project you will need two colors of yarn, one for the pumpkin itself and another one for the stem and curly part. You will also need a crochet hook that goes with your yarn, some stuffing/filling and a long sewing needle that we will use at the end to close the stem and give the pumpkin shape.
Abbreviations used:
Sc – single crochet
Inc – increase
Invdec – invisible decrease
Slst – Slip stitch
Pumpkin body and stem
Row 1: Start with the pumpkin color and 6 sc into a magic ring (6)
Row 2: (1 slst, 1 sc in each loop)x6 (12)
Row 3: (1 slst, 1 inc) x 6 (18)
Row 4: (1 slst, 1 sc, 1 inc) x 6 (24)
Row 5: (1 slst, 1 sc, 1 inc, 1 sc) x 6 (30)
Row 6: (1 slst, 2 sc, 1 inc, 1 sc) x 6 (36)
Row 7: (1 slst, 2 sc, 1 inc, 2 sc) x 6 (42)
Row 8: (1 slst, 3 sc, 1 inc, 2 sc) x 6 (48)
Row 9: (1 slst, 3 sc, 1 inc, 3 sc) x 6 (54)
Row 10: (1 slst, 4 sc, 1 inc, 3 sc) x 6 (60)
Row 11: (1 slst, 4 sc, 1 inc, 4 sc) x 6 (66)
Row 12: (1 slst, 5 sc, 1 inc, 4 sc) x 6 (72)
Row 13-24: (1 slst, 11 sc) x 6 (72)
Row 25: (1 slst, 5 sc, 1 invdec, 4 sc) x 6 (66)
Row 26: (1 slst, 4 sc, 1 invdec, 4 sc) x 6 (60)
Row 27: (1 slst, 4 sc, 1 invdec, 3 sc) x 6 (54)
Row 28: (1 slst, 3 sc, 1 invdec, 3 sc) x 6 (48)
Row 29: (1 slst, 3 sc, 1 invdec, 2 sc) x 6 (42)
Row 30: (1 slst, 2 sc, 1 invdec, 2 sc) x 6 (36)
Row 31: (1 slst, 2 sc, 1 invdec, 1 sc) x 6 (30)
Row 32: (1 slst, 1 sc, 1 invdec, 1 sc) x 6 (24)
Row 33: (1 slst, 1 sc, 1 invdec) x 6 (18)
Row 34: (1 slst, 1 invdec) x 6 (12)
Row 35: 1 slst – cut your pumkin yarn, leaving a long tail. Switch to the stem yarn and crochet 6 invdec (6)
Rows 36-42: 6 sc (6)
Cut the yarn and leave a long tail. Using the needle, pick up all the sc left and pull tight together for a clean finish. Then take the end of the yarn and thread it to the other end of the pumpkin to hide the yarn.
Now take the long tail of the pumpkin yarn and, using the needle, go back and forward between the pumpkin ends and pull to make it tight. Secure the yarn and thread it through the pumpkin to hide the yarn.
Curly tail
This looks beautiful as it is, but you can also add a curly part. For this, put your crochet through one stitch of the stem and chain 10 stitches. Make 2 sc into the first loop, and repeat making 2 sc into each of the remaining loops. Secure your yarn, cut it and twist the curly a little. There you have it, your pumpkin is ready and awesome!
I hope you enjoyed this pattern. Follow us on Facebook, Instagram, Youtube and TikTok to get our latest handmade and homemade news!